How to Use a Blood Lancet Pen China Top 10 Guide?

Time:2026-11-15 Author:Isabella
0%

A glucose check often begins with small details: clean hands, a dry fingertip, and a lancet set to a comfortable depth. How to use a blood lancet pen for glucose monitoring? This guide answers that question with practical steps, from preparing the device to safely disposing of each used lancet. It also introduces ten blood lancet pen options associated with the Chinese market, with attention to clear instructions, adjustable depth, grip, and replacement-lancet availability. Product features can vary, so the device’s own instructions remain essential.

For a clinician’s perspective, Dr. Anne Peters, an endocrinologist and diabetes specialist, offers a useful guiding principle. In paraphrase, rather than as a verbatim quotation: consistent technique and careful interpretation help make glucose results more useful. That means washing and drying hands, using a new lancet, and puncturing the side of a fingertip rather than its center. A meter reading is one piece of information, not a diagnosis by itself.

The guide will also cover common mistakes, such as reusing lancets or sharing a lancing device. Never share the pen, even when changing the lancet. Follow the manufacturer’s directions and your healthcare professional’s advice, especially if you have reduced sensation or frequent skin irritation. A tiny drop of blood can still bring real questions. This guide aims to make the routine clearer, while leaving room to reflect: comfort and technique may take a little practice.
How to Use a Blood Lancet Pen China Top 10 Guide?

Understanding Blood Lancet Pens and Their Components

Understanding Blood Lancet Pens and Their Components

A blood lancet pen is a spring-loaded device that helps control how a sterile lancet contacts the fingertip. The IDF Diabetes Atlas, 10th edition, estimated that 537 million adults aged 20–79 were living with diabetes worldwide in 2021. This makes dependable blood-glucose monitoring important for many people. A lancet pen is simple, but its parts have specific jobs.

The outer cap protects the lancet before use. Inside, a holder secures the lancet, while the depth selector adjusts how far its tip may travel. The cocking mechanism loads the spring; the release button activates it. A small mismatch can matter. Check that the lancet fits the holder and that the cap is removed before testing. Set the depth according to the device instructions and your skin, rather than assuming a deeper setting is better. I would not treat the settings as interchangeable across pens. Use each lancet once, never share the pen, and place used lancets in an appropriate sharps container. Stop if a part is cracked, loose, or difficult to operate.

How to Use a Blood Lancet Pen: Understanding Its Components

Lancet gauge and approximate needle diameter. A higher gauge number generally indicates a thinner needle. These values reflect standard needle sizes; actual lancet dimensions can vary by design.

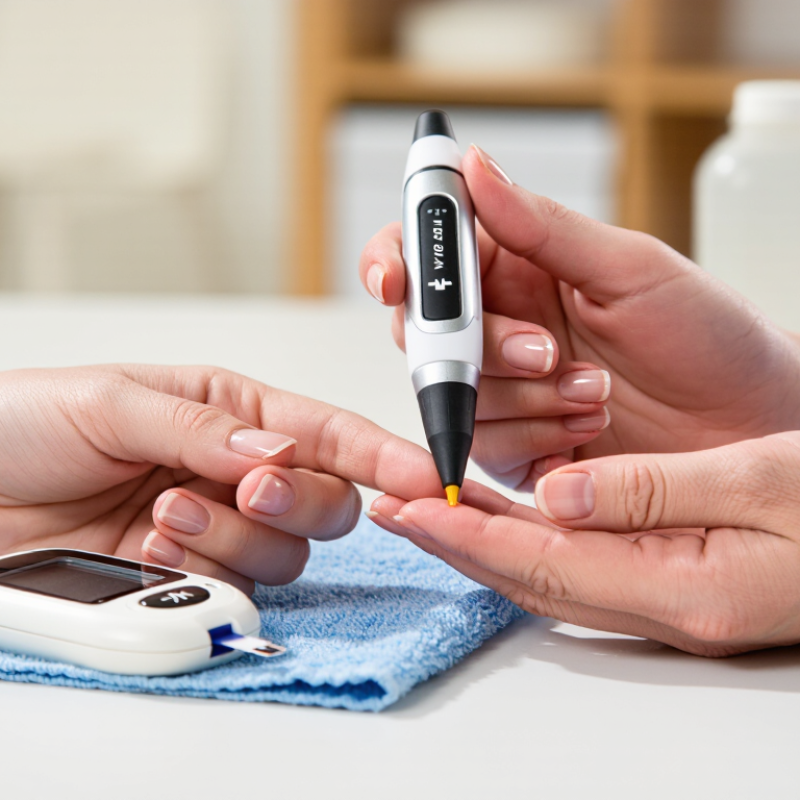
Using the pen: Common components include the sterile lancet, lancet holder, depth selector, release button, and protective cap. Load a new lancet, set the depth according to the device instructions, and use the release button to obtain a blood sample. Dispose of the used lancet in an appropriate sharps container.

Choosing a Compatible Lancet and Setting the Depth

A lancet pen works safely only with lancets listed as compatible in its instructions. Check the fit, cap, and loading method; do not force a lancet that sticks or wobbles. The International Diabetes Federation’s Diabetes Atlas, 10th edition, estimated that 537 million adults worldwide were living with diabetes in 2021. That figure highlights the scale of glucose monitoring, but it does not define a safe lancet depth. Use a new sterile lancet for each test, and never share the device.

Depth depends on your skin and testing site. Wash and dry your hands, then use the side of a fingertip. Start at the lowest depth setting and increase it one step only if blood does not form easily. Warm hands help. Avoid squeezing hard, which can affect the sample. Follow the device instructions and any guidance from your clinician. There is no universal best setting. It is easy to overcorrect; check the lancet fit and technique before choosing a deeper setting.

Tips: Rotate fingers and note the setting that produces a usable drop with little discomfort. Replace a bent or dull lancet. If you repeatedly struggle to get enough blood, ask a pharmacist or diabetes educator to review your technique.

How to Use a Blood Lancet Pen China Top 10 Guide? - Choosing a Compatible Lancet and Setting the Depth

No. Guide item What to check Practical guidance
1 Confirm pen–lancet compatibility Lancets do not fit every lancing device. Check the pen’s instructions or packaging for the specified lancet type and size before use. Do not force a lancet that does not fit securely.
2 Check the lancet gauge Gauge describes needle thickness; a higher gauge number generally indicates a thinner needle. Choose a compatible gauge that suits the device and your needs. A thinner lancet may feel more comfortable for some people, but blood-sample requirements vary.
3 Inspect packaging and condition Look for intact, clean packaging and the stated expiration date. Do not use a lancet if its package is damaged, it is expired, or the needle appears bent or contaminated.
4 Wash and dry your hands Clean, dry hands help reduce contamination and improve the reliability of many finger-stick glucose checks. Wash with soap and warm water, then dry thoroughly. Follow your meter’s instructions if a different preparation method is specified.
5 Load the lancet safely The loading and cap-removal steps vary by device. Follow the device instructions. Keep fingers away from the needle tip, and do not cock or activate the pen until it is ready to use.
6 Set the puncture depth Depth scales and their numbers are not standardized across lancing devices. Start with a shallow setting recommended by the device instructions. Increase gradually only if the sample is insufficient; use the least painful setting that gives an adequate sample.
7 Choose the finger-stick site The sides of the fingertips are commonly used for capillary blood sampling. Rotate fingers and puncture sites to reduce soreness. Avoid areas that are bruised, swollen, infected, or otherwise injured.
8 Obtain the sample The required blood volume depends on the test strip or sampling device. Position the pen as directed and press the release button. If needed, gently encourage a drop of blood; avoid forceful squeezing, which can affect the sample.
9 Use each lancet once A used lancet can become blunt and may carry bloodborne germs. Never share a lancing device, even if the lancet is changed. Replace the lancet after each use and follow the device’s instructions for removal.
10 Dispose of sharps properly Used lancets have a sharp point and should not be left loose. Place used lancets in an appropriate puncture-resistant sharps container and follow local disposal guidance. Ask a healthcare professional or local authority about disposal options in your area.

Note: Follow the instructions supplied with your lancing device and glucose meter. Ask a healthcare professional for guidance if finger-stick testing is painful, repeatedly produces too little blood, or is difficult to perform.

Preparing the Device and Cleaning the Sampling Site

Before using a blood lancet pen, read its instructions and check that the device is clean, intact, and ready for use. Match the lancet to the pen as directed, and use a new, sterile lancet for each test. Keep the cap on until you are ready. Small details matter.

Wash your hands with soap and warm water, then dry them fully with a clean towel. Choose the sampling site recommended for your test. Check that the skin is clean and unbroken. If soap and water are unavailable, follow your care team’s advice about using an alcohol swab, and let the skin dry completely before lancing. Damp skin can affect the sample.

Pause for a moment. It is easy to rush when supplies are spread across a counter. Set the meter and test strip within reach, but keep the lancet away from other people. Never share a pen, even if its lancet is changed. After testing, discard the used lancet in an approved sharps container, following local guidance. If the site looks irritated or you are unsure about the device setting, stop and check the instructions or ask a healthcare professional.

Performing a Fingerstick and Collecting a Blood Sample

Wash your hands with soap and warm water, then dry them completely. Warm fingers often produce a better blood drop. Check that the lancet pen is clean and assembled according to its instructions. Use a new, sterile lancet for each test. Never share the pen or lancet. Set the depth as directed, and choose the side of a fingertip rather than its center. That spot is usually less sensitive. Keep it steady.

Prick the finger, then let a drop form without pressing hard. If needed, gently massage from the palm toward the fingertip. Strong squeezing can affect the sample. Follow your test kit’s instructions about whether to wipe away the first drop; requirements can differ. Touch the sample to the collection area as directed, and make sure there is enough blood to fill it. Don’t smear the drop across the surface. A small sample may cause an error, which is frustrating but worth checking before repeating the test.

Apply gentle pressure with clean gauze or tissue until the bleeding stops. Put the used lancet in an appropriate sharps container, not loose in household waste. If the finger keeps bleeding, or you feel faint, pause and seek medical advice. The process may feel awkward at first. That is normal. Follow the device instructions, especially if your clinician has given you different guidance.

Disposing of the Lancet and Caring for the Pen

After each blood glucose test, remove the used lancet from the lancing pen without touching its sharp tip. Use the pen’s release method, and avoid forcing the cap or mechanism. Put the lancet directly into a puncture-resistant sharps container with a secure lid. Do not leave it loose on a table or in a pocket. No shortcuts. If a suitable container is not available, keep the lancet in a sturdy, closed container until you can dispose of it safely. Follow local disposal guidance, since household waste rules can differ.

Never reuse a lancet or share a lancing pen, even with family members. Blood can remain on the device and spread infection. Clean the pen’s outside as directed in its instructions, using a lightly damp cloth when appropriate. Do not soak it or rinse its internal parts. Let it dry fully before storing. Keep it capped and away from children, pets, heat, and moisture.

Check the pen regularly for cracks, residue, or a stiff release button. If it looks damaged or does not work smoothly, stop using it and consult its instructions or a healthcare professional. It is easy to rush this step after a test. A small detail, but an important one. I would also keep the sharps container near the testing area, while still out of reach of children.

FAQS

What are the main parts of a blood lancet pen?

The cap protects the lancet, and the holder keeps it in place. A depth selector adjusts the puncture, while the spring and release button activate it.

How should I choose the depth setting?

Follow the pen’s instructions and consider your skin. A deeper setting is not automatically better. Settings can differ between pens.

How do I prepare before testing?

Wash your hands with warm, soapy water and dry them fully with a clean towel. Check that the pen is clean and undamaged.

Can I share a lancet pen if I change the lancet?

No. Never share the pen, even with a new lancet. Use a fresh, sterile lancet for each test.

Where should I prick my finger?

Choose the side of a fingertip rather than its center, as directed by your test instructions. Keep the pen steady. Warm fingers may help form a blood drop.

Should I wipe away the first blood drop?

Follow your test kit’s instructions because recommendations can vary. Avoid squeezing hard or smearing the drop across the collection area.

What if the blood drop seems too small?

Gently massage from your palm toward your fingertip if needed. Check that the sample fills the collection area as instructed. A small sample can cause an error.

How should I dispose of a used lancet?

Place it in an appropriate sharps container and follow local guidance. Do not leave it loose in household waste.

When should I stop and get advice?

Stop if the pen is cracked, loose, or difficult to use. Seek medical advice if bleeding continues or you feel faint. Some steps still feel awkward at first.

Conclusion

This guide explains the parts of a blood lancet pen, including the lancet holder, depth control, release button, and cap. It outlines how to choose a lancet that fits the device and adjust the puncture depth to suit your skin, beginning with a shallow setting when appropriate. Before testing, wash and dry your hands, prepare the pen according to its instructions, and clean the sampling site as needed. These steps help make the process more orderly and hygienic.

How to use a blood lancet pen for glucose monitoring? Insert a fresh lancet, secure the cap, select a suitable depth, and activate the device against the side of a fingertip. Collect the blood sample as directed by your glucose meter, without repeatedly squeezing the finger. After use, remove the lancet carefully and place it in an appropriate sharps container; never reuse or share lancets. Clean and store the pen following its instructions, and seek guidance from a healthcare professional if you are unsure about safe use.

Isabella

Isabella

Isabella is a dedicated marketing professional with a sharp focus on driving brand growth and engagement through strategic content creation. With an extensive background in digital marketing, she combines her passion for storytelling with her keen understanding of industry trends to deliver......